Error 809 is a VPN error that usually occurs when a firewall blocks the VPN ports between the user and the VPN server. Well if you’re facing this problem then here are the steps to fix it.
It’s very common for VPN connections to experience some problems along the road. If you’re using Windows and a VPN together, it’s possible that you will face the VPN error 809.
A common reason is that when Windows doesn’t allow you to establish a VPN connection through you’re firewall and if you don’t use a firewall but on a NAT device this error might show up.
Network Address Translation (NAT) is meant for IP address conservation. It lets private IP networks with unregistered IP addresses to connect to the internet. NAT normally operates on a router, connecting two or more networks, and alters the unregistered network into legal addresses.
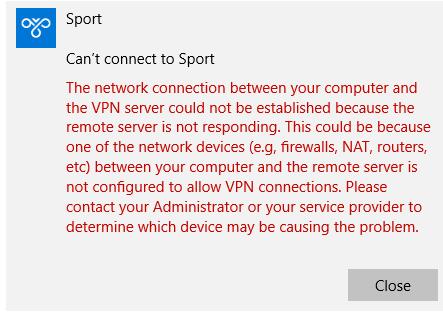
The error message looks something like this:
“The network connection between your computer and the VPN server could not be established.”
Here are the ways on how to fix the VPN error 809 on Windows:
- Enable the ports on your firewall/router
- Add value to the Windows registry
- Disable Xbox Live Networking services
- Enable IKEv2 fragmentation
1. Enable the ports on your firewall/router
Usually, the VPN error 809 is caused by the PPTP port (TCP 1723) or port L2TP or IKEv2 port (UDP ports 500 and 4500) being blocked by a firewall or router. Since our VPN runs on the IKEv2 protocol this might be a reason you will face this error. Well, the solution is pretty simple! Simply enable the ports on the firewall or your router.
2. Add value to the Windows registry
When you are trying to establish your VPN connection, if your MX is placed behind a NAT, you will have to add the “AssumeUDPEncapsulationContextOnSendRule” DWORD value to the Windows registry.
This lets Windows OS to establish a secure connection when your VPN server and the computer client are behind NAT devices. Here’s how:
- Login to Windows with admin access
- Type ‘Run’ on the search bar and click on the application
- Type “regedit” and click on ‘OK’
- Now in the open Window find this path: HKEY_LOCAL_MACHINE > SYSTEM > CurrentControlSet > Services > PolicyAgent
**The full path cannot be seen in the below picture
- Once you get to the path Right click and create a new ‘DWORD (32-bit) Value’
- Change the Value name to “AssumeUDPEncapsulationContextOnSendRule”
- Change the new entry and change Value Data from “0” to “2“
- Click ‘OK’
- Reboot the computer and test the connection
Note: This is a perfect solution when computer client is behind NAT devices.
3. Disable Xbox Live Networking services
A Windows 10 service may block access to the L2TP/IPsec VPN so to resolve this and prevent seeing the error 809 you can do this:
- Type “services” in the search box and click on ‘Services’
- Find ‘Xbox Live Networking Services’ and double click on it
- On the drop down menu of ‘startup type’ select “Disabled”
- Click “Apply” and click on ‘OK’
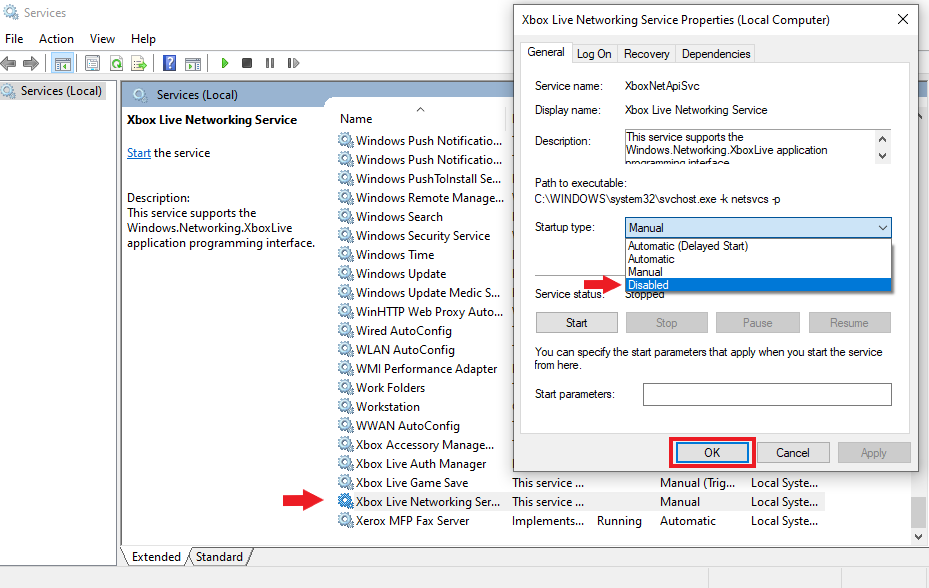
- Check if your VPN connection works!
4. Enable IKEv2 Fragmentation
VPN error 809 can occur due to the IKE fragmentation while using the IKEv2 VPN protocol. What happens is quite technical. However, let me break it down to a simple explanation.
During the IKEv2 connection between the client and the server, the packet size may exceed the IP Maximum Transmission Unit. This results in the packets being fragmented. Due to the fragmentation sometimes the intermediary devices like routers, NAT devices, or firewalls will block IP fragments.
Hence the VPN connection will not be established. Even though it sounds complicated, what you will have to do to get over this error is simple!
Solution: Update your Windows 10 devices to the latest version. IKEv2 fragmentation was introduced in Windows 10 1803 and is enabled by default.
Congratulations!
By now your VPN should work without getting any errors.
Article ID: 2197, Created: September 7, 2021 at 1:56 AM, Modified: September 7, 2021 at 2:02 AM